Lets admit that migration of any sort is a pain and migrating something to the cloud for the first time is always challenging. I have been going through this for quite some time and finally had the chance to play with Azure Migrate and it has been a good experience overall.
If you plan to go to Azure you will have 2 choices for your current environment:
- Recreate you infrastructure from scratch
- Use Azure Site Recovery to “move” your on-premise VMs to Azure
The goal of this post is to explain you what is Server Migration and how it can help you for your migration to Azure.
Azure Migrate
The Azure Migrate service assesses on-premises workloads for migration to Azure. The service assesses the migration suitability of on-premises machines, performs performance-based sizing, and provides cost estimations for running on-premises machines in Azure. If you’re contemplating lift-and-shift migrations, or are in the early assessment stages of migration, this service is for you. After the assessment, you can use services such as Azure Site Recovery and Azure Database Migration Service, to migrate the machines to Azure.
Why Azure Migrate?
Azure Migrate helps you to:
- Assess Azure Readiness: Assess whether your on-premises machines are suitable for running in Azure.
- Get Size Recommendations: Get size recommendations for Azure VMs based on the performance history of on-premises VMs.
- Estimate Monthly Costs: Get estimated costs for running on-premises machines in Azure.
- Migrate with High Confidence: Visualize dependencies of on-premises machines to create groups of machines that you will assess and migrate together.
Current Limitations
- You can only assess on-premises VMware virtual machines (VMs) for migration to Azure VMs. The VMware VMs must be managed by vCenter Server (version 5.5, 6.0, 6.5 or 6.7).
- If you want to assess Hyper-VMs and physical servers, use the Azure Site Recovery Deployment Planner for Hyper-V, and our partner tools for physical machines.
- You can discover up to 1500 VMs in a single discovery and up to 1500 VMs in a single project. Additionally, you can assess up to 1500 VMs in a single assessment.
- If you want to discover a larger environment, you can split the discovery and create multiple projects. Learn more. Azure Migrate supports up to 20 projects per subscription.
- Azure Migrate only supports managed disks for migration assessment.
- You can only create an Azure Migrate project in the following geographies. However, this does not restrict your ability to create assessments for other target Azure locations.
- The dependency visualization functionality is not available in Azure Government.
Migration Goals
When migrating any workload to a new environment, whether it be another datacenter, or to a public cloud, you should have a clear set of goals for migration in mind. Note that there are both technology-focused and business-focused goals that motivate potential migrations, but any such effort should result in direct benefits to the organization’s business.
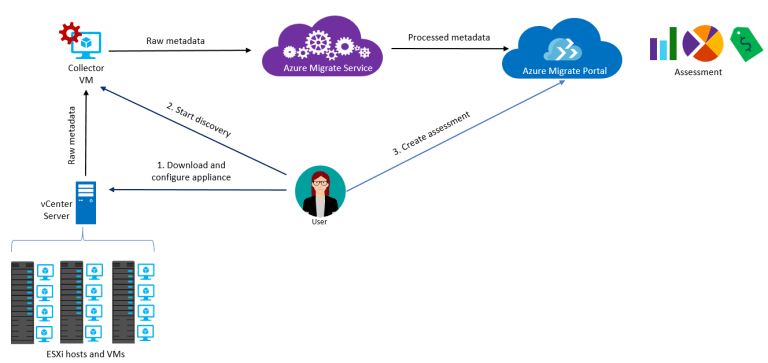
How Azure Migrate works
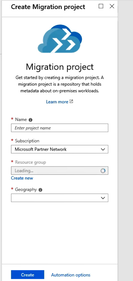
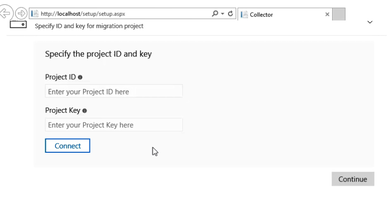
- You create an Azure Migrate project.
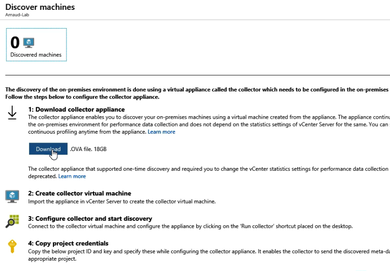
- Azure Migrate uses an on-premises VM called the collector appliance, to discover information about your on-premises machines. To create the appliance, you download a setup file in Open Virtualization Appliance (.ova) format, and import it as a VM on your on-premises vCenter Server.
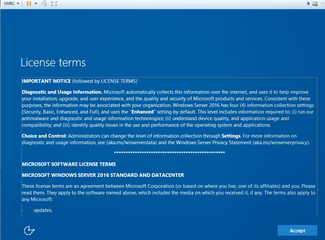
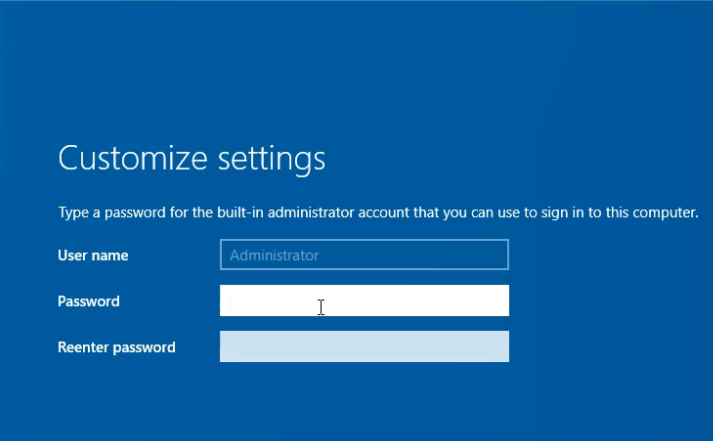
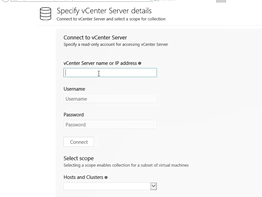
- You connect to the VM from the vCenter Server, and specify a new password for it while connecting.
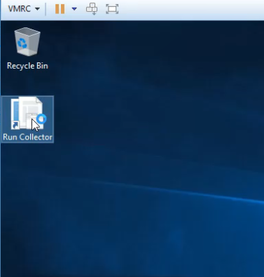
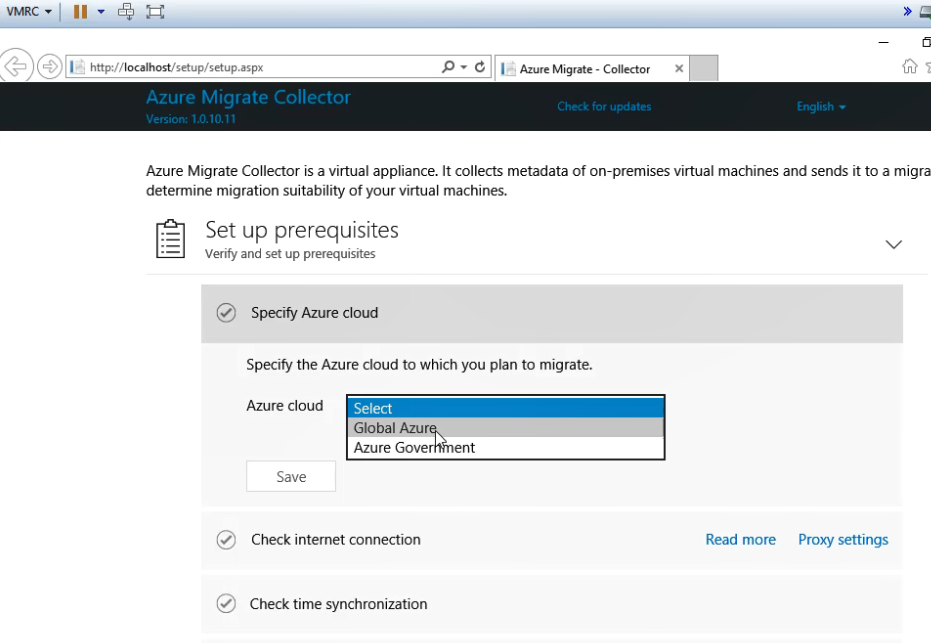
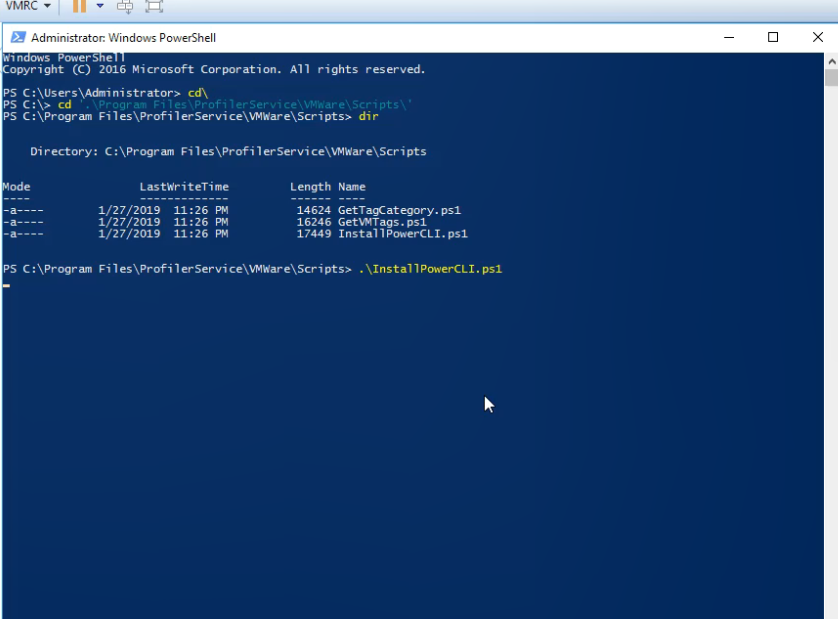
- You run the collector on the VM to initiate discovery.
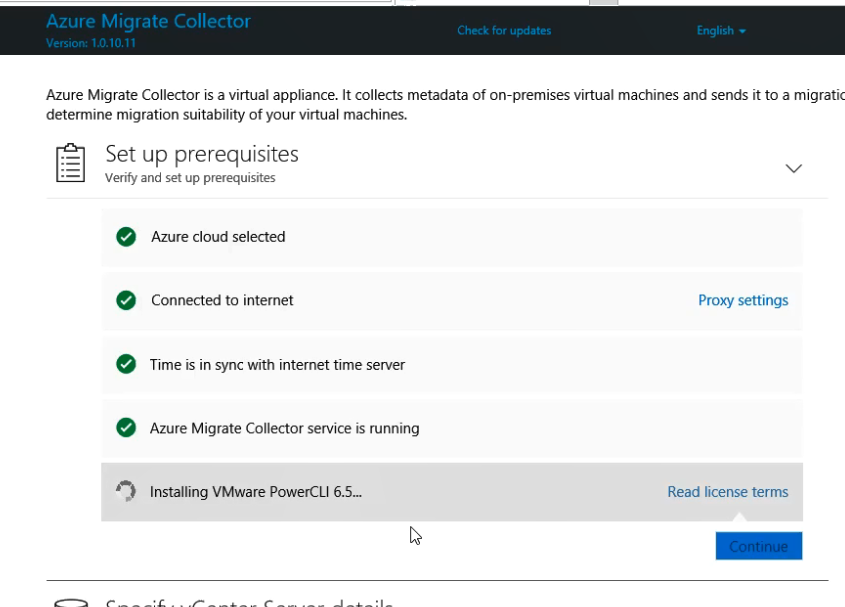
- The collector collects VM metadata using the VMware PowerCLI cmdlets. Discovery is agentless, and doesn’t install anything on VMware hosts or VMs. The collected metadata includes VM information (cores, memory, disks, disk sizes, and network adapters). It also collects performance data for VMs, including CPU and memory usage, disk IOPS, disk throughput (MBps), and network output (MBps).
- The metadata is pushed to the Azure Migrate project. You can view it in the Azure portal.
- For the purposes of assessment, you gather the discovered VMs into groups. For example, you might group VMs that run the same application. For more precise grouping, you can use dependency visualization to view dependencies of a specific machine, or for all machines in a group and refine the group.
- After a group is defined, you create an assessment for it.
- After the assessment finishes, you can view it in the portal, or download it in Excel format.
Migration Phases
When planning for migration of workloads to Azure, consider three phases: Discover, Migrate, and Optimize.
Discover: In the Discover phase you work to get better visibility of applications, workloads, and data in your environment, and assess the optimal resource level to run them in Microsoft Azure. Use this information to help decide which workloads to move. Azure Migrate is the primary tool for this, and includes:
- Automated server, app, and database discovery.
- Intelligent workload right-sizing and costing for maximum ROI.
- Workload configuration analyses and recommendations.
Migrate: In the Migrate phase you move selected workloads to Azure. There are a variety of sources including physical servers and virtualized workloads hosted in Hyper-V or VMware environments. Azure Site Recovery is the primary tool in this area and includes:
- Lifting and shifting of servers, apps, databases, and data.
- Containerization of existing applications and infrastructure.
- Modernization options for apps and databases.
Optimize: In the Optimize phase you fine tune your Azure-based workloads and maximize your ROI.
There are many Microsoft partners to help you with backup, monitoring, security assessments, and cost management.
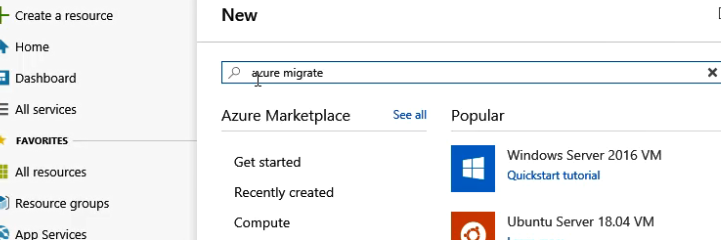
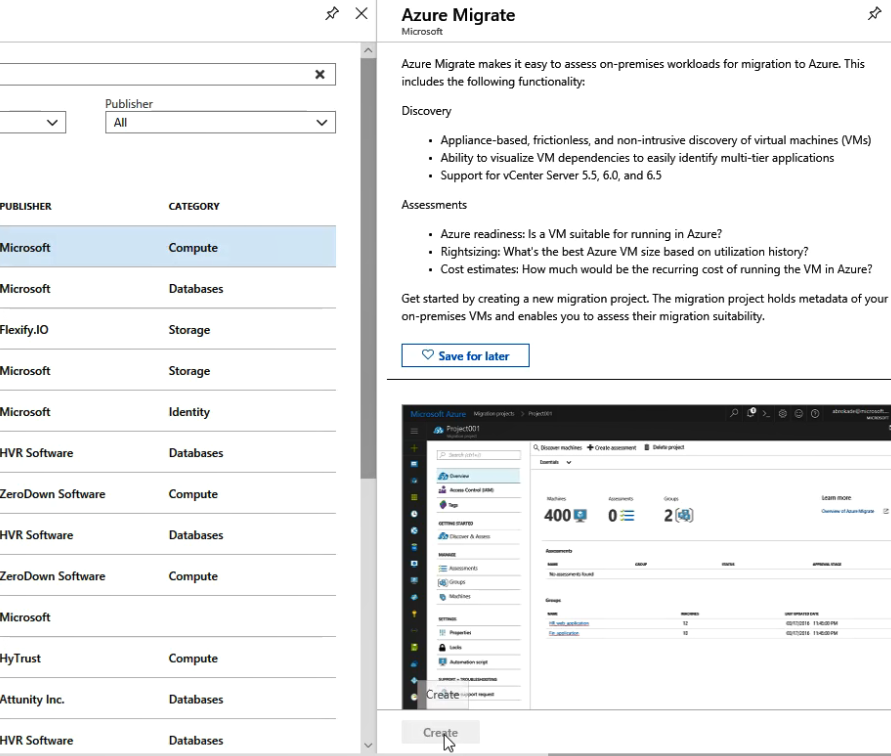
Deploy Azure Migrate
Microsoft provide an Azure Template for Azure Migrate that can help you to estimate your migration cost.
Here is a step by step guide with screenshots:

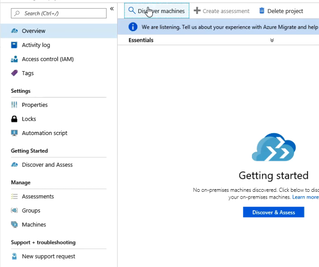
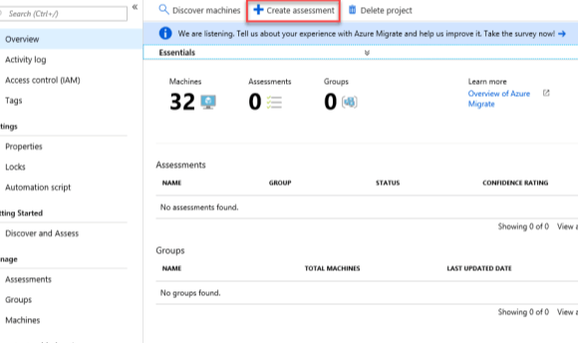
Discover Machine
Click on Create assessment
Provide a name for the assessment, add the required VM and click on Create assessment
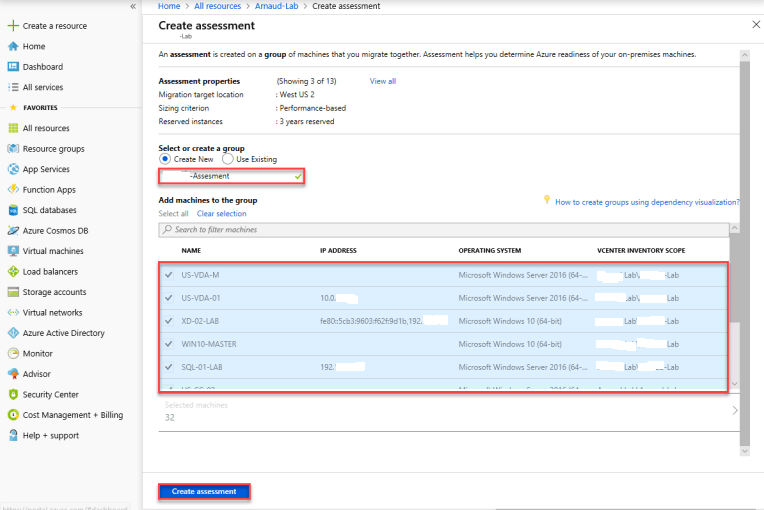
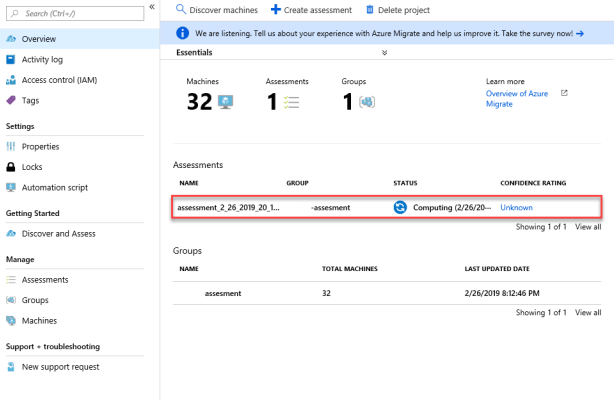
The process of creating the assessment starts
Analyze
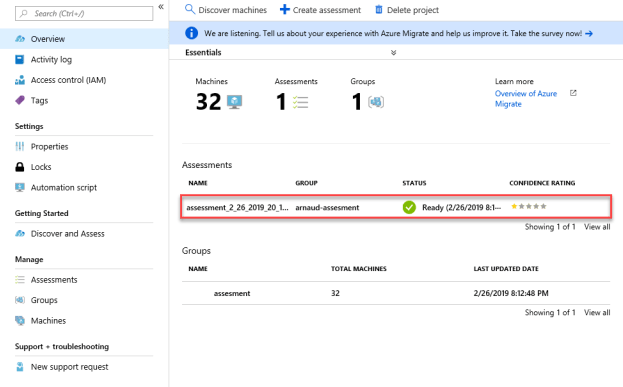
When the assessment is created, click on it to view details
You will need to wait some time for the confidence rating to be accurate.
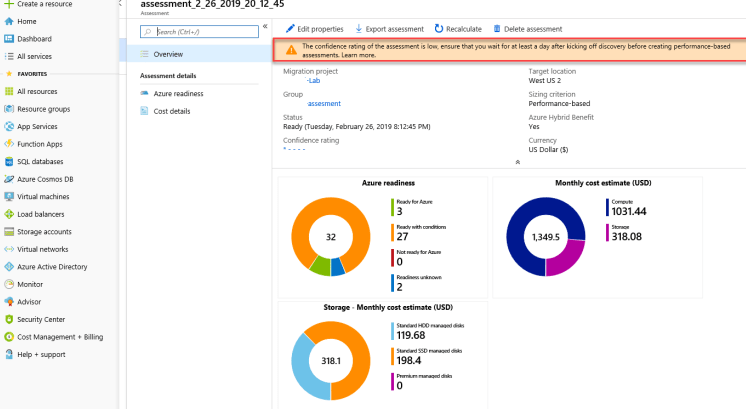
You can see:
- Azure readiness
- Storage – Monthly cost estimate
- Monthly cost estimate
After 1 or more days, click on Recalculate
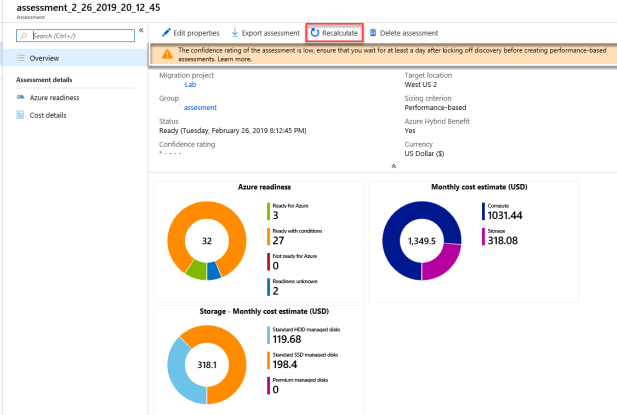
As you can see above, the amount has changed. Click on Cost details
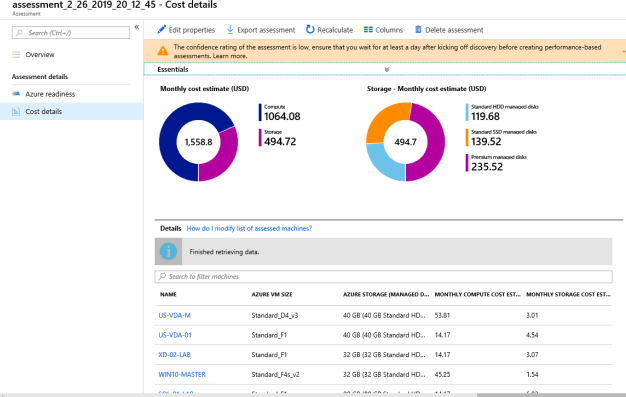
You will see the proposed:
- Instance (Size)
- Storage
- Costs
I discovered this tool and really like it, it’s very useful when you want to migrate from on-premise to Azure for feasibility and cost estimate.
Be careful when you select your source VMs as by default you will have the Azure Migrate server which is will not be required.
However you will be able to modify the Group assessment to add or remove machines.
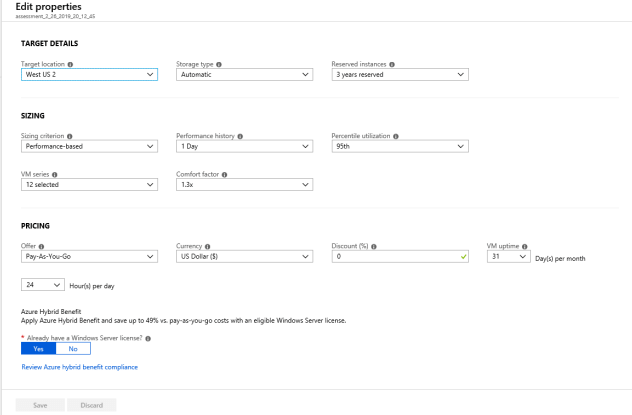
You will also be able to change a lot of settings and see the impact on your estimated costs.
Microsoft provide a well Azure Cost Estimator but you will need to provide information such as instance size, disk type, etc to estimate your cost. Always be careful since these settings will directly effect your cost and things go out of budget if not planned accordingly.
Hello SpHammad, Information about the Azure Migrate service is Usefull for me and i learn some more new concept of this blog. Thanks for sharing an article like this!!!